Getting Started with Verde
Place your first Seedlet homes and learn the calm build loop.
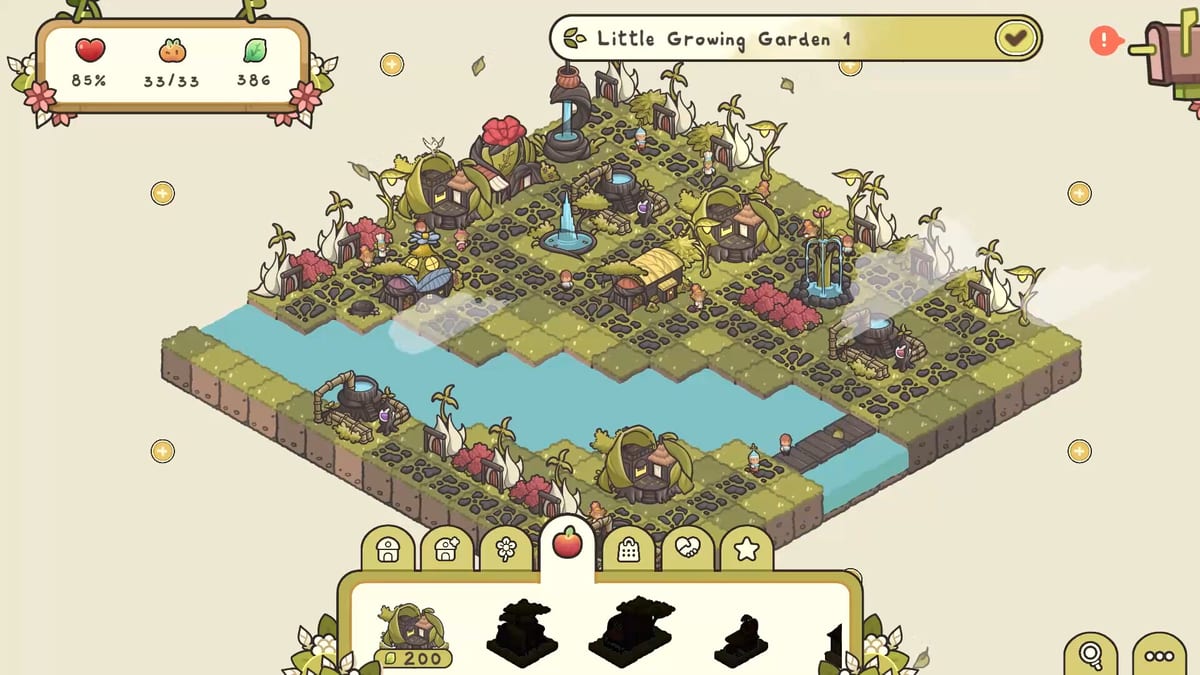
Verde is a cozy city management game about restoring magical gardens in Dewdrop Valley. You play as a green-fingered student pulled into a storybook world, guided by a helpful owl companion, and asked to rebuild settlements for tiny seed-like creatures called Seedlets. This getting-started guide covers the first session after you create a save: camera movement, your first housing block, water coverage, early demand buildings, and how Leaves fund expansion.
If you only want a systems checklist, skim How to Play Verde. If you are on the free Steam demo, pair this page with the Verde Demo Guide. For launch timing and store info, see the Verde Release Date page.
Create a save and learn the camera
Start a new save and name your garden world. Early cutscenes introduce the Mage Academy gardening club framing without forcing dense dialogue. When you gain control, treat camera comfort as the first skill:
- Click and hold the left mouse button or middle mouse button to pan.
- Scroll the mouse wheel to zoom.
- Middle-click (not hold-drag) to rotate a building ghost while placing it.
Verde is currently built around mouse and keyboard. Reviews and demo sessions note that dedicated controller layouts for Steam Deck are limited or missing, so plan for a pointer. Full binding notes live on the Verde Controls page.
Build the first small house
Your opening quest asks you to house Seedlets. Open the build menu and look under Housing for a small house — a compact home sized for a couple of Seedlets. Place it on clear dirt, leaving a little breathing room if you care about later pathing and roof ornaments. After placement you can:
- Click rocks or stumps and spend Leaves to clear obstacles.
- Open the paintbrush tool to change body, accessory, door, and colors.
- Save a look as a preset once you find a combination you like.
Customization is optional on minute one, but learning the paintbrush early prevents every street from looking identical. Deeper options are covered in Building Customization.
Claim the water distributor blueprint
Completing the first housing quest unlocks a Water Distributor blueprint. Place it from the Utility category. Distributors convert nearby dirt into living green tiles and supply a limited number of nearby buildings — demo players often see a supply rating such as two of eight after the first placement. Put the distributor where its radius covers your starter cluster without wasting coverage on unreachable edges.
Water is the first hard requirement that turns empty homes into growing homes. Click a house to inspect resident count, happiness needs, and demand categories. When water is missing, expansion stalls even if you have plenty of empty plots.
Unlock markets, goods, and social buildings
Later tutorial rewards unlock a Market (nutrition), Flower Shop (goods), Fountain (social), and Leaves for spending. Build at least one of each near the starter houses, then drop simple decorations such as bushes, lamps, and paths. Paths are not only cosmetic: Seedlets pathing across bare dirt looks unfinished, and decoration points directly feed the happiness targets in early quests.
Open the heat map from the magnifying glass control to see happiness, decoration, water, nutrition, goods, and social layers. Red means unmet demand; cooler colors mean the neighborhood is stabilizing. If one house stays red while neighbors are fine, check capacity — a market can reach tiles but still fail if it is already serving too many homes. More detail sits in Seedlets Care and Water and Resources.
Grow population and buy land
Leaves arrive as Seedlets live happily and the town population rises. Spend Leaves on more houses, more service buildings, and land expansions marked by plus icons around the garden border. Expansion parcels do not all cost the same; later tiles get pricier, so avoid buying every edge the moment it appears. Clear debris after each purchase, extend water first, then housing, then services.
Early quests usually ask for population thresholds, happiness percentages, and a few land buys. Treat those as soft pacing rails rather than a speedrun. Verde is designed for players who enjoy pretty towns more than perfect optimization.
What to do after the tutorial soft-ends
Once the owl companion says you understand the basics, you will unlock additional blueprints such as cafes, benches, medium houses, parks, playgrounds, and eventually a new region. Before you rush the beach biome, finish reading How to Unlock Regions so misting fans and cooling requirements do not surprise you. For a paced campaign route, continue with the Campaign Walkthrough. For freeform decorating after story beats, open Sandbox Mode.
Beginner mistakes to avoid
- Placing every house before any water or market coverage.
- Ignoring the heat map when a quest stalls at 50% happiness.
- Spending all Leaves on land while service capacity is still red.
- Forgetting that some biomes add extra needs beyond water.
- Assuming controller support matches cozy Steam Deck expectations.
Next pages on this wiki
Keep Build Priority Hub nearby when you wonder what to construct next, check System Requirements before recommending the game to friends, and skim the First Week Checklist after you install. Patch 1.0.2 adds a first-boot language panel and clickable tutorial objectives — if a percentage stalls, click the pinned line instead of rebuilding the whole street. Verde rewards calm iteration: house, water, serve, decorate, expand, repeat.
Frequently Asked Questions
Quick answers to the most common questions.
How long is the Verde tutorial?
Long enough to teach camera, housing, water, markets, decoration, and land expansion. The free demo covers a substantial first-region session.
Do I need to customize buildings immediately?
No, but learning the paintbrush early makes neighborhoods feel unique and prepares you for biome variety later.
What are Leaves used for?
Leaves fund obstacle clearing, buildings, and land expansions. Happy Seedlets and rising population help you earn more.
Where do I check house needs?
Click a house to see residents and demand categories, or open the heat map for neighborhood-wide layers.